I don't much like lid stays. They take up too much room, look contrived, and force you to compromise the design of your chest. I've never seen one I like, or one that works well. The best lid stay in my opinion is the wall behind your (tool) chest, but what if you can't put your chest against the wall?
But before you assume my opinion has any value, I should say that I don't have any experience working from a tool chest, only building chests for home use, but my opinion about stays applies to tool chests as well, I would imagine.
So I got thinking, what about a stay that holds the lid open, but also keeps it from shutting? So, not a chain, not a wooden stop at the back of the lid, not a gas-shock-encrusted whoopty-do from Rockler, but simply a stick that engages both the lid and carcase and immobilizes the lid.
Here's what I came up with. I made it with materials and tools that anyone can get locally.
To make the stay look hand-forged, I did a little hand forgery. First I needed to drill the two holes on the ends.
The hole is 15/64", which is a tad smaller than the shaft of the 1/4" rivet.
A bit of work at the 1" belt grinder, along with some files established the shape of the end.
I decided to try my hand at some fancy file work. This is really fun stuff. A bit tricky keeping the two sides symmetrical though.
After I fancified the other end, I took a bastard file to the faces to get rid of the mill finish and make it look more "natural".
Then I whacked the steel with a hammer to mimic the look of a hand-wrought piece. Finally, I went over the whole thing with a wire wheel to blend it all in and ease any sharp edges.
I chamfered the rivets to ease their entry in the hole.
Then to make it all look hand-wrought I filed the head of the rivet and whacked it with a hammer.
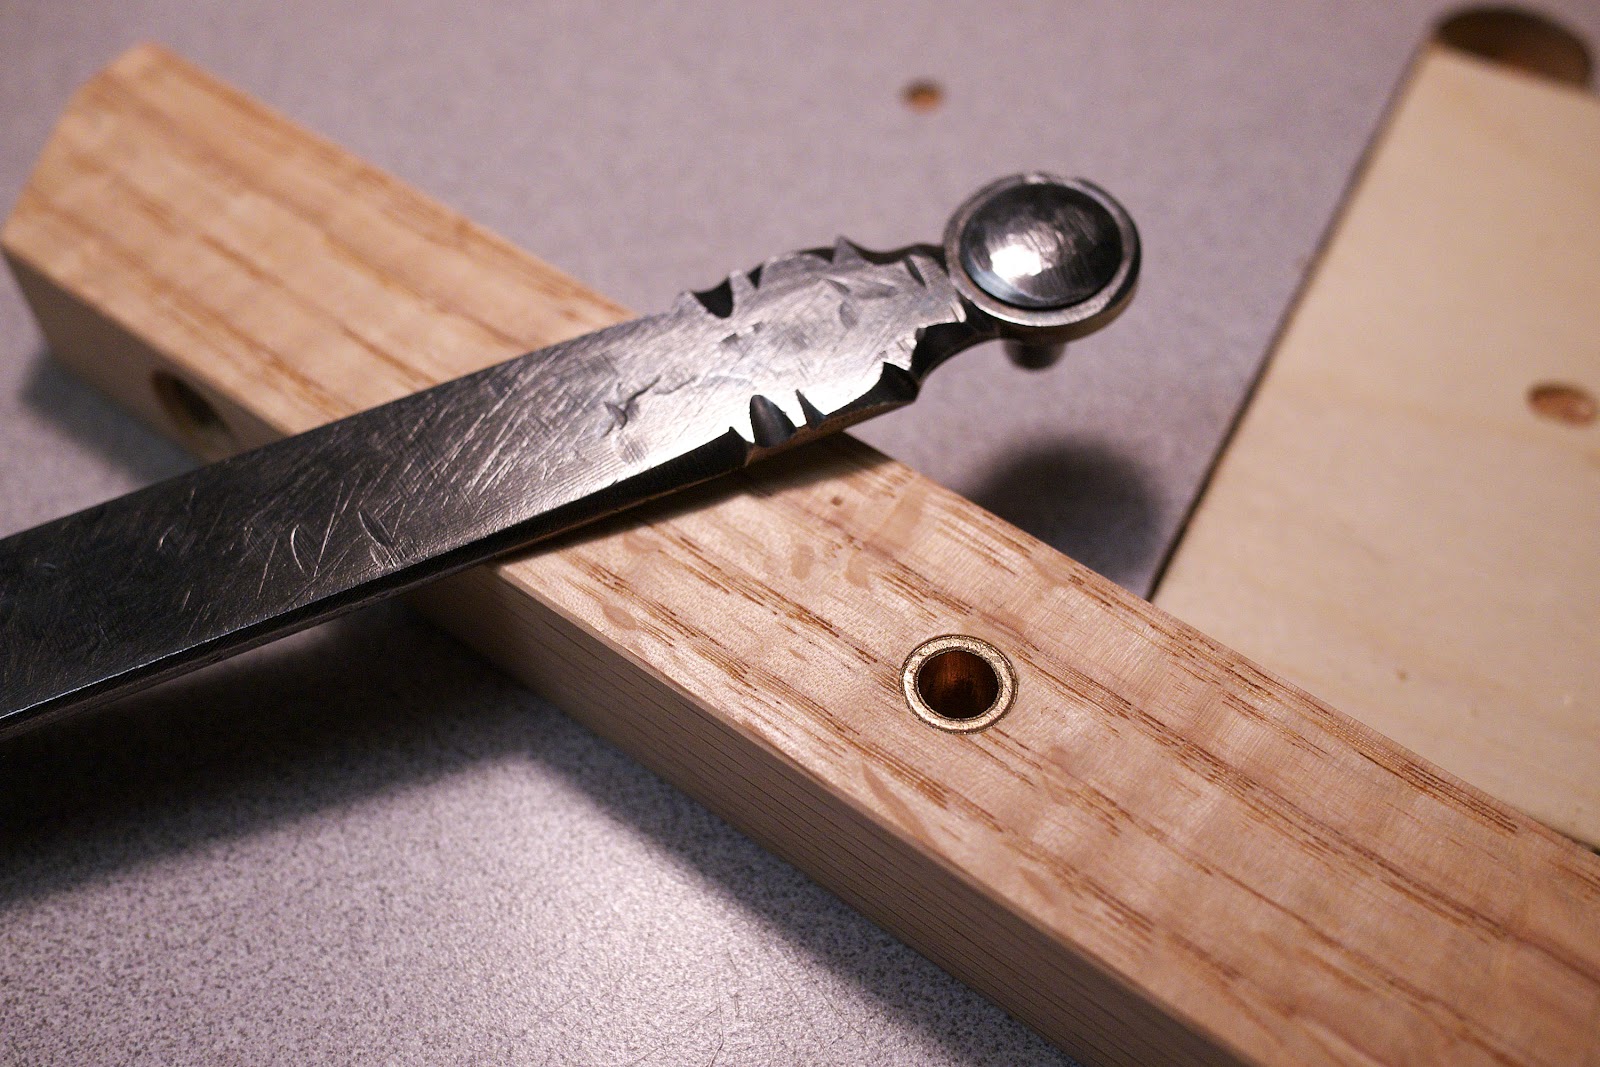
Another minute on the wire wheel, followed up by a couple coats of gun blue and some wax made it look like this.
I cut the bronze bearings in half to get two per piece (they ended up about 3/8" long.) The batten for the chest lid gets drilled to accept the bearing. This keeps the stay pin from wallowing out the hole over time. I glued it in with a bit of CA.
Did the same to the carcase.


Great addition! The file & hammer work really class it up. +1 for use of easily acquired materials. It seems like someone ought to be able to use similar methods & materials to eliminate the hinges, making an integral 4-bar linkage on both ends. Though besides the geometry homework, resulting structural concerns could also be an issue. I'll have to think on that some more.
ReplyDeleteAfter thinking on this and poking around I found a good video demonstration of what I was thinking of conceptually in the above comment: https://www.youtube.com/watch?v=WOBX8_zQitE skip past the box joint jig and box build (10:28) and there are several clever concepts that could be implemented on future projects.(You may remember Carl from his retractable casters video, also good)
DeleteCould you add some kind of a flip stop to the batten that would slide over the stay and lock it in place? That could keep it from getting knocked out by accident, yet still be easy to remove when you want.
ReplyDeleteYeah, but I wanted to make this as simply as possible. We'll see how it fares as is.
DeleteNice work, i really thought it was hang forged by Peter Ross when i first saw the picture. You really have a flair for nice work!
ReplyDeleteDoes anyone notice the subtlety of glued edge joints? Please explain how end grain can reverse in a flitch board? Two, for sure, but where is the interface? Did a similar work on the Jefferson book case. You have your lesson plan, Jameel.
ReplyDeleteJust got lucky. I glued these boards up rather quickly.
DeleteMan, I love file work. Or as we call it here in Rockford Il., a Swedish Milling Machine. Great work!
ReplyDeleteBeautiful chest. I have an old tool chest that was my grandfather's - not sure where it came from before that. The top of the chest is a panel inset in a narrow dovetailed frame of mahogany. A second oak panel about 1/4 the size of the lid is inset into that panel and sits proud of the lid by about 1/4". This adds a little more heft to the lid and eliminates a perfectly flat top to put stuff down on. The hinges are on the inside of the frame and the lower rear edge of the lid frame is rabbeted away so that when the lid is open, the rabbeted edge rests on the edge of another mahogany frame dovetailed around the top edge of the pine case. No stay required to keep it from falling back. It could be bumped closed, although it leans back slightly so that it would take a pretty good knock to get it to close by accident.
ReplyDelete