Tuesday was a momentous day at Brese Plane. I managed to almost
completely negate what I had accomplished from Monday up until noon on
Tuesday. In one bonehead moment I completely destroyed my chances of
making this tool, and in the next moment I was back on top.
For
any of you who have read David Pye, just because machines are involved
does not mean there is no workmanship of risk. With digital readouts,
strings of decimals, and the tendency to invert figures (3.167 can
easily become 3.176) the workmanship of risk mostly takes place in the
mind, and not in the hand. Coming from a hands-on background, I would
much rather rely on my eyes and hands to create, than on the mind to
control a machine in a numerically controlled manner. I flunked Algebra
in high school and college.
The video tells more of the story.
Note: These videos are in 720 HD. Make sure you enlarge the video for best viewing.

Tuesday, January 17, 2012

Monday, January 16, 2012
Winter Smoother - Monday

For the last three years I've taken some time off in the early part of the year to visit my friend Ron Brese at his shop in Thomaston Georgia. This year I asked Ron if he would assist me in making a plane as a gift for a good friend of Benchcrafted. He happily obliged. So last week I spent several long days in Ron's shop building this plane.
But here's the interesting part. This is a prototype of a new line of planes that Ron has been developing for the past year. Before I arrived, Ron had begun his own prototype, in order to test out some of the details of the plane so my build could have a better chance of succeeding. As Ron finished up his plane, I built mine, and they both came together as a sort of fraternal twins by week's end. My plane did not get completed of course in only five days. But more on that later in the week.
Ron did not have a name for this new line of tools. So after looking over Ron's prints last week, and seeing that he had written "winter smoother" on one of them, the name stuck. I'm not sure if Ron will keep the name, but for me this tool will always be the "winter smoother."
~ Monday ~
The first day of the build I roughed out the plane sides from precision ground 1018 steel using a bandsaw. After a quick course in basic mill operation Ron set me loose on his Bridgeport-style mill and I proceeded to mill up the sides of the plane, as well as the sole pieces and bedding plate. My constant fear was crashing the bit into one of the vises, the table, or the workpiece. None of that happened, but I did end up encountering some rather tense moments. At one point I was feeling pretty proud of what I had accomplished, and the next I felt like I was back in junior high industrial arts. Needless to say, I learned an enormous amount on Monday. Ron was an extremely patient teacher, and gave me a wide latitude in figuring things out for myself. That ended up teaching me a great lesson, but it also made for some frustrating moments. I guess the best way to learn is to make mistakes. I won't argue with that. As Monday drew to a close I set my plane parts in a safe place and breathed a sigh of relief that I had made it through the first day without completely ruining Ron's mill, or my plane parts. If I had known what Tuesday had in store, I may have just booked an early flight home....
Thursday, January 5, 2012
Heading To Brese Plane


It's enormously beneficial to be able to bounce ideas off a fellow tool maker. Chances are we might also get a little slap happy from working too many hours without interruption. Last time we ended up pulling dryer sheets from the mouths of planes and thought it was the funniest thing since Foster Brooks.
But before we head down to the Brese Plane shop, Ron and I will be stopping off to visit our friend Steve Quehl at his Woodcraft of Atlanta store. Steve carries Benchcrafted vises and has just received a shipment of Moxon vises. Ron and I will be in the store from about 1-3pm. If you're in the area, please stop by and say hello. We'll have a Moxon set up on Steve's Benchcrafted Roubo bench for you to try out.
Watch for a series of blog posts in the coming weeks about my visit. I am taking along my video camera this time.

Monday, January 2, 2012
Left-Hand Tail Vises For Sale

As 2011 came to an end we did a little housekeeping at the Benchcrafted warehouse.
Here's what we found.
1. A left-handed V.2 Tail Vise with Chrome handwheel. This vise was used in a demo bench and saw little use. It's for all intents and purposes, new. This has our current V.2 square nut block, but it's not the universal plate, so its a true lefty. $299 plus shipping. SOLD
2. A left-handed V.2 Tail Vise with our current satin iron hand wheel. This is a brand new vise. It's the last of our left-hand only Tail Vises. So if you're in the market for a left-hand Tail Vise, here's your chance to get one and save a few bucks. $330, plus shipping.
3. Taco Bell Talking Chihuahua. Press his belly and he says "Feliz Navidad Amigos". According to carbon dating, we've had this plush toy since at least 1998. And it still works. According to this website, its an antique. After stumbling on this, we remembered how much we love tacos. Good+ Make offer.
If you would like any of these items, drop an email to info@benchcrafted.com and we'll send you an invoice. Make sure you include your full name and address for an accurate shipping quote.
Monday, December 26, 2011
Unsolicited
Dear Benchcrafted,
Just thought I would drop you a note to let you know
that I have completed my Shaker style bench All of the bencrafted items were
outstanding in their finish and operation. From the great set of plans and 3D
drawings, to the awesome Leg and Tail vise assemblies, everything was first
class.
It took me about 5 months from the time I started work
on my bench until completion, and the process was quite a learning
experience.
Thanks again for all your help along the way....Here are some pictures of the finished product..
Joe Black


Friday, December 23, 2011
Big Wood Vise Back At It

I received a nice email last night from Joe Comunale, of Big Wood Vise. I used Big Wood Vise screws on my first Roubo bench build. This was before we were manufacturing vises here at Benchcrafted. If you like wood screws (and who doesn't for the classic look alone, plus they are extremely fast and hold like a Bull Terrier's maw) I recommend you look at Joe's new website. Just a few years ago it was near impossible to find good quality wood screws.


Wednesday, December 21, 2011
Tail Vise Instructions Update

So we not only updated the instructions to provide the hole sizes, we also added the holes sizes to the templates themselves, which should make it easy to drill those holes without leafing back through the instructions.
As always, all of our technical documents are available on our downloads page.
Here is a direct link to the updated instructions.
Saturday, December 17, 2011
Unsolicited
Dear Benchcrafted,
Since you guys helped me so
much along the way I thought you might want to see the finished product.
Very happy I decided to take this on. Thanks for all your help. I've
learned (started, anyway) an incredible amount of skills just doing this
bench. I am hooked.


Don Bursch


Saturday, December 10, 2011
Didn't quite make it
We do all our own photography and videography here at Benchcrafted. Sometimes we get some good images, sometimes not. Once in a while we get images that we like but aren't terribly useful. The problem lies with steel.............steel and machined parts are very photogenic. Here's a few just for fun.


Friday, December 9, 2011
Retrofit a European Style Bench With A Benchcrafted Tail Vise
What do you do if you have a European style workbench with a moving-block style tail vise and you want a Benchcrafted Tail Vise instead?
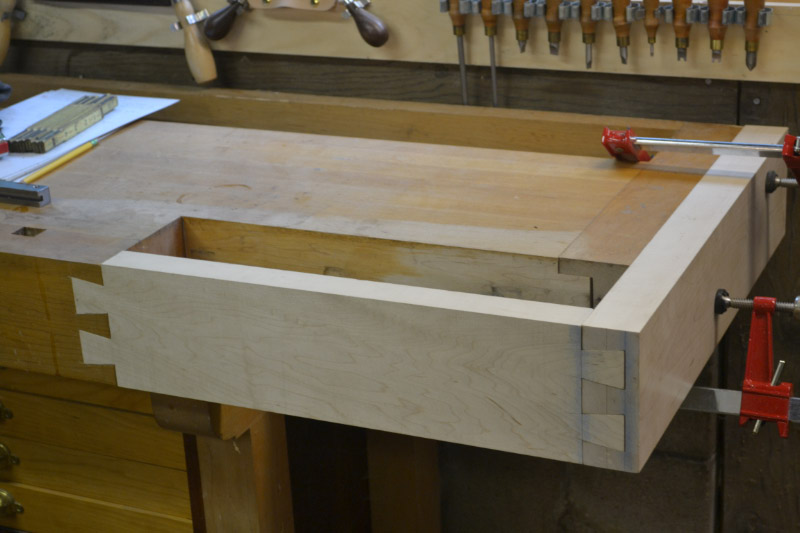
You do what customer John Dixon did. Bust our your woodworking tools and make it happen. You are, after all, a woodworker.
Follow along with John's pictorial step-by-step if you'd like to try this. We like his method. It's strong, and looks good.


You do what customer John Dixon did. Bust our your woodworking tools and make it happen. You are, after all, a woodworker.
Follow along with John's pictorial step-by-step if you'd like to try this. We like his method. It's strong, and looks good.




Subscribe to:
Posts (Atom)