

Damage control. I couldn't stomach scrapping the jaws, so I regrouped and reglued. I cut a notch in the angled face for some clamp purchase. See what I mean by keeping stuff as big as possible for as long as possible? The glue lines on the blocks are now tight and invisible.

I began squaring up the 90 degree side, which is all end grain. My clamping notch came in quite handy.

Here's my process. The first step is to get the long grain sides and bottom perpendicular to each other. That's pretty easy stuff, since the blocks were already at that state before glue up. I check the end for square in one direction only. This is important. I don't try to get the surface square to both the faces and the bottom at once. It's much easier and controllable to concentrate on one plane at a time. Here I'm checking against the bottom after a few passes to get rid of the bandsawn surface. At this point I don't even check against the sides of the jaw, just the bottom. To remove high spots I take progressive stop cuts, starting at the area that needs the most material removal. Take a short stroke, then another one a little longer, and so forth. I never tilt the sole of the plane since that's what "sees" flat. What's happening here is your creating a small plateau, then another one slightly larger with each progressive stroke. The plane rides the plateau until you've removed material down to the floor of the valley. Of course its on a minute scale. Once the end is flat and perpendicular in one plane, I rotate the piece and check the end for perpendicular with the sides. If it's out of square, I now have a very easy time of squaring it up, since I know the other plane is square, I can simply take full length strokes all the way across the end. This time instead of using stop cuts, I simply take more full length passes over the high areas. As long as I take full length strokes I'm guaranteed not to throw the other plane off square. Finally, when I'm close to perpendicular, I take one light pass at back at 90 degrees to flatten the orginal plane, which should still be square, but could be a little humped if I didn't take even passes across the other direction.

Once its all flat and square I make one final light pass with a dead sharp finely set plane simply to improve the surface quality of the end grain. You need to be careful with blowing out the arrises with this technique, but if you use a finely set plane, very sharp, and take light passes it should be minimal. Another reason to keep things oversize.
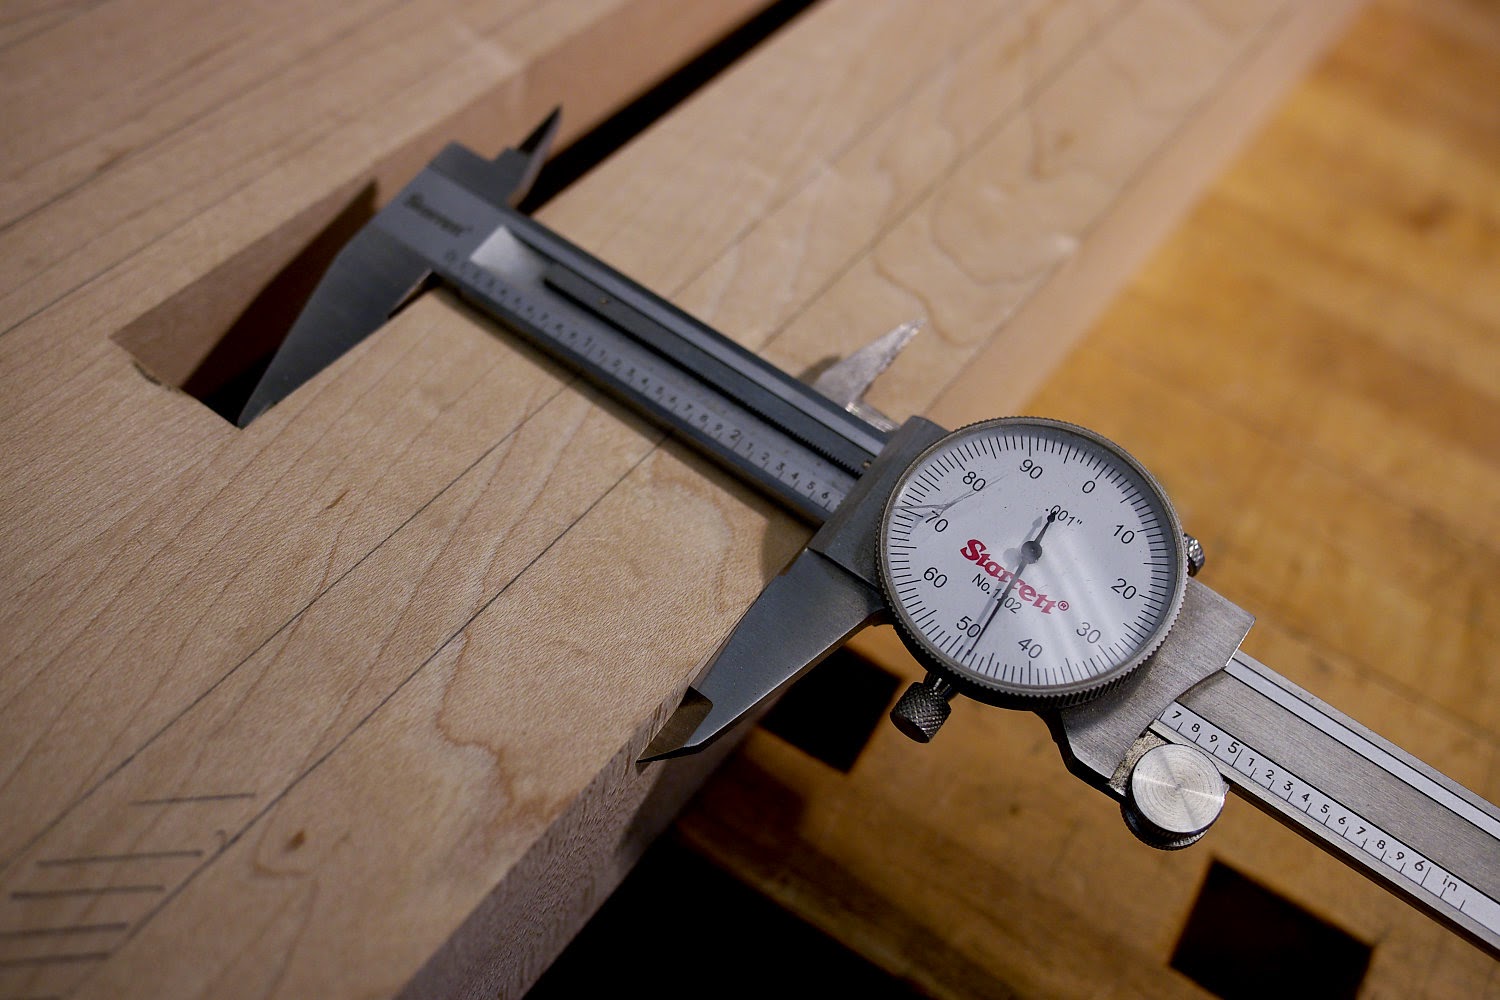
To mill the grooves in the body and jaws I ripped the waste off the back (90 degree) edge of the body and then tweaked that edge so it was parallel to the slot in the body. This is important since the moving jaws also key into this slot. Not parallel, and they will bind.

I'm within a couple thou of parallel. Close enough.

I set up a dado stack for 5/8" and made the stop cuts on the table saw. I didn't bother with a physical stop, but just drew a line on the fence. I made the cut up to the line, back out about 1/4", shut the saw off with my knee, then waited for the blade to stop before moving again.

Don't forget to cut the grooves on the two jaws at the same fence setting. I wanted the back edge of the base to be bit proud of the end grain faces of the jaws, so I used some masking tape as a shim to shift the blocks. That makes it very easy to flush up the base with jaws later.
I forgot to mill up the half miter jaw before cutting these grooves, so I had to setup the dado stack again and try to nail the locations. More on that later.


Next, I got busy fitting the runners. Put the ray plane horizontal if you can. The runners won't snug up as much in the summer.


Once the moving jaw is riding on its rails, send it off to the nut house and mark for the garter pin location.

I just drew a circle. This is just a clearance hole, it doesn't need to be dead accurate.

3/4" hole about 5/16" deep.

The pocket for the half miter jaw.


You could jig up for this on the table saw, but what a waste of time. I rip down with my crosscut panel saw, because I don't have a rip panel saw. It takes a long time.


The other cut is made. That's ripping.

Here's a moment of hand tool zen. Sharpen up your largest shoulder plane, set the iron dead square, a light cut, and proceed to take buttery shaving of creamy hard maple with precision and control.

I start taking down the vertical wall first.

Before I plane entirely to the reference kerf, I flip the piece and start working on the 22.5 deg side.


I check progress regularly with protractor head-equipped Starrett combo square tool device. If you need to tweak the angle, make progressive stopped cuts.

Three things must be perfect. The flatness of the surfaces, their relationship to each other (square) and the angle of the half miter surface to the back of the jaw. The final step is to make in the inside corner crisp and tidy with a paring chisel.


The retaining block for the half miter jaw can be had from the remainder of the body spacer stock.


Jameel, thanks for posting these build entries. I truly appreciate them. Learning not only the build sequence but also some valuable techniques and approaches to how to build not only this project but also projects in general. I'm still waiting for the parts to arrive (not a problem since they have to clear customs and then make their way to Nova Scotia) but, I've started the build and am just behind you. Don't want to get ahead of myself and lose out on some valuable tips. :)
ReplyDeleteI think you mean "learning from my mistakes."
DeleteThat inside corner is beautiful!
ReplyDeleteDid you loose any more than 1/8" on the jaw(s) reglue?
I am miles away from doing this, but I love the documentation and photography.
Thanks, as usual.
Tim
P.S. I emailed this comment by accident.
It ended up right at 1/8" less. And that's okay, since the original is not consistent anyway.
Delete