BLOG

Monday, December 30, 2013

Nails and Cracks


When Schwarz post his nail cabinet to the LAP blog a few months ago, I knew immediately I would build one. Why? I can't explain. It just struck me. It's a ridiculously easy project, so no challenge aspect there, but it seems lately I'm drawn to shop furniture that makes the place more pleasant to be in. So the back wall of my personal shop is undergoing a change. And this nail cabinet is the first part of the process. Later I'll cover the drywall with oak flooring and hang my new chest upon it.


I'm using Sapele from some 12/4 planks from Midwest Woodworking that Andy Brownell picked up for me a couple years ago. I had to do a bit of resawing, but the stuff stayed put as I sliced of 3/8" thick pieces. Very stable. I'm not a big fan of Sapele, so I thought shop furniture would be a good resting place for this material. I don't yet know if I have enough stock for the drawers, so in the spirit of the original, I may use something else. I do have a long beam of Douglas Fir that came out of an old library in Eugene, OR. It has ridiculously tight grain and would make fine drawer boxes.

If you end up building this project, make sure you err on the side of a tad loose on the egg crate dividers, especially if you use softwood. I have a hard time dropping my luthier's tolerances sometimes. I had a couple of the short grain section pop free when banging it together. Glued them back on in a jiffy though.

I'm also opting for card frame pulls instead of the bin pulls and knobs from the original. I need the labels. I picked up 21 of them from Van Dyke's, on sale for less than $3 ea. in an oil rubbed bronze finish. You can get nice, heavy cast pulls, but I didn't want to spend over $100 just on the pulls. Here's the link. http://www.vandykes.com/product.aspx?p=207415&green=5321A530-741F-5ECE-AFBC-B78CB130B044


Here's some pics of my French Oak bench in the dead of the coldest winter I can remember. The top is crowned (as expected) and the leg tenons are poking through about 1/32". The bench still works, although it does need flattening to perform better. In case you're interested, my top has opened up quite a bit on the worst end. The red arrows point to pencil lines that I drew across the ends of the checks when I finished the bench this summer. The lower check has just about doubled in size. In a month or two I'll wedge the gaps in the leg tenons, then flatten the top. I only ended up wedging one leg when I built the bench, and its the only leg that hasn't poked through the top. It will be interesting to see what the other three do next winter.


Saturday, December 14, 2013

More Carver's Vises--Just In Time


We have in stock a handful of Carver's Vises, just in time for Christmas gift-giving. These are literally the last of them until we get enough demand to do another run, which may be never.

This is a sweet vise that I've been using so much lately that I have not removed it from the back left corner of the bench. I use it for detail work, sharpening scrapers, anything smallish that I need better control over. Heck, I even use it sometimes to hold magazines or pictures for reference while I work.

If you're into making charming shop furniture, just for the fun of it, this fills the bill perfectly, especially if you've got some special thickish wood kicking around the shop. We do have beech though, in case you need to buy wood.

If this is your first exposure to the Carver's Vise, click here for everything we've written about it.

After you're done with that, click here for the details on the vise itself and ordering info.

Order buttons are up on our Store Page. Refresh your browser if they don't appear. 

If you order now, these will ship early next week, and should arrive by the 24th. Send us an email if you absolutely need it by the 24th and we will sell you faster shipping.


Thursday, December 12, 2013

XX Small Split Top Roubo


Camil Milincu, a customer from Romania whom we've posted about before, sent us these pictures of a bench he just finished. Camil nailed this one. Here's his description:

Hello Jameel,

I have attached some pictures of a bench I've finished. It's for a friend which had a tough request: all the stuff that's on my bench (seen here -ed.), but in 53 inches. The easiest thing to do was to chop the end vise. But since he might move to a bigger shop (and I hope he does), I had to come up with a plan to keep all the hardware intact.  I've sunk the rails in the underside of the benchtop and made a deep recess for the screw. As I had to keep some wood for the leg tenon, the last dog had to be shortened. This explains the weird hole.
For this one the toothing plane was used only in the center of the slabs, leaving a smooth strip near the dogs.

Let's hope the next one will be a "regular" :).

Best regards and Happy Holidays,
Camil


Wednesday, November 20, 2013

Galbert Drawsharp In Action


Earlier this month we paid a visit to Peter Galbert at his chair shop in Sterling, MA. Besides catching the chairmaking bug something fierce, we also took the time to shoot some video of Pete demonstrating the Drawsharp.

Although this video is edited a little (mostly to remove some shaky spots) it shows Pete taking a neglected drawknife from a pathetic state to making waxy, end-grain shavings in white pine in real time. The entire process took about 8 minutes. The latter portion of the video shows how to freshen the edge of a drawknife that has been previously sharpened with a Drawsharp. That process takes about 2-3 minutes. Pete did this numerous times to several different drawknives, all with widely varying bevel configurations. The results were all the same.

A note on The Rehab Kit. Its not required to sharpen a drawknife. The included abrasives will get you to your final edge just fine. Here's when you may want to pick up the Rehab Kit.

- You're hesitant to take a particularly ratty knife to the grinder.

- You're sharpening ratty drawknives out in the woods.


On the former, we suggest you educate yourself on the particulars of grinding drawknives. Because as awesome as the Drawsharp is, you may toast your edge beyond its capabilities. And by that we mean damage beyond normal use. Dropping the knife, shaving too close to something metal, a nail or some foreign object in a workpiece, your neighbor using the knife as a paint scraper. Point being, if you get a deep nick in your blade, obviously you will need to grind it out, or simply use that knife for less important work until normal sharpening sessions take you past the nick.

But grinding is not as scary as it may seem. It only takes a light touch (as with all grinding) and very little jigging on your grinder's tool rest. If you have a 1" belt grinder, those work quite well for drawknives, since there is no motor to interfere with the knife's handles. Take a look at Pete's blog for lots of info on grinding. As you 'll see, you can do it quick and dirty, or make a full blown micro-adjustable tool rest.

You can order a Drawsharp directly from us, via our Store Page.

The following domestic dealers also carry the Drawsharp.

Chairnotes Tools
Highland Woodworking
Lie-Nielsen Toolworks
Lee Valley Tools (and Canada)


and in Germany
Dieter Schmid Fine Tools


A pleasant surprise was the arrival of the young and talented toolmaker and woodworker Tim Manney. Tim makes the Chairnotes Reamer, (highly recommended) and is currently developing a chairmaker's adze with Peter Galbert. I got a chance to try out the adze on an actual chair seat, and although I'm relatively new to this tool, everything about it felt so right. Tim also makes exquisite chairs and spoons. It's quite difficult to photograph the crisp details and delicate forms of Tim's work. Each spoon displays a real deftness and skill not only with the tools, but also the design and form. I know these pictures don't do justice, but here goes nonetheless. Make sure you take a look at Tim's blog.


Sunday, November 3, 2013

Minecrafted


Last week George and I finished up the Minecraft chest. For a project that we stretched out over 7 months, a 10-year old boy was surprisingly patient. I let him make a few of the critical decisions along the way, including how involved to get with the finish.

Here's how we made it.


First we had to do some research. Steve's chest is a cube made up of 8-bit pixels. Count the pixels and settle on an overall size for the chest and then we could determine the pixel size. We decided a cubic foot would be a good size for a 10-year old boy.


The cube-shaped chest is fourteen pixels square, so each pixel would be 7/8" x 7/8". That would yield about 1 cubic foot. We decided early on that we'd keep the project simple for ease and speed. We didn't want to fuss with a bunch of different wood species to capture an exact look. We did want to retain the pixelated 8-bit look, but not so much that the finished piece looked like a prop, hokey or temporary, so we refined some of the elements just a little. We wanted it to look like a piece of furniture. We settled on cherry for the panel's fields, and macassar ebony for the border of each field. Although the border is pixelated, we wanted an uninterrupted border for our chest, both for looks and durability. We joined the border at the corners with butt joints to keep the rectilinear theme. Mitered corners would have looked odd.

We started out with cherry veneer, but quickly realized there was a quicker (and better) way to assemble the cherry pixels.


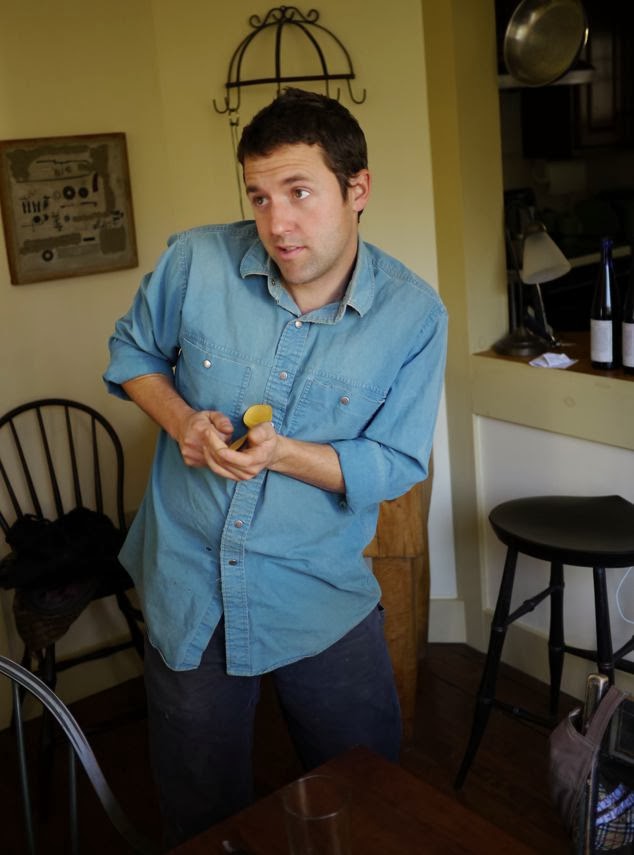
We found a wide cherry board (a couple inches wider than the chest) not paying much attention to any color variation within the board. The grain direction is indicated by the yellow arrow. The end grain is the dark end (obviously.)


Next we jointed and planed the board to 7/8" thick, then crosscut strips off the end of the board at 7/8" wide.


We then rotated some of the strips 90 degrees in an irregular pattern so the face grain on the end of each strip alternates 90 degrees (or not at all), to the adjacent piece. This would mimic the pixels in the 8-bit chest, some of which are identical to the adjacent pixel.


We glued this entire assembly together as pictured with epoxy, since many of the joints are face-grain to end-grain. A light pass with a hand plane cleaned up the surface after gluing.


Next we ripped 3/32" strips off the edge of the slab, hand-planing the cut edge of the slab after each cut so one side of each strip was smooth. The show face of each cherry "pixel" is entirely face grain. No end grain is visible in the finished piece. Because the original piece of cherry was wide, and contained both flat, rift and quartered grain, the color and chatoyant quality of each pixel varies widely such that the finished piece looks like it was made from cherry of many different shades. In fact, all the cherry on the chest came from one board.

After sawing each strip from the edge of the slab, they can be joined edge to edge to form the large panels for each side of the chest. We cut all the strips and intentionally mixed them up in order to create a more random look. We didn't want a butcher-block or checker-board pattern in the finished piece, although we did end up with a little of that here and there (I let George arrange many of the strips hinself, explaining the idea of randomness as we worked.)


Here the strips are getting taped together for gluing to the panels. The back side (planed surface) was first assembled with blue painters tape, butting the joints tight. Then the opposite face (the bandsawn surface) was taped with veneer tape. After the veneer tape dried, the masking tape was removed. This would be the glue surface. We made enough for five panels.


We glued the panels to 1/2" baltic birch plywood using a friend's vacuum press. We freshened up the surface of each panel with a smoothing plane, working diagonally across the panel to reduce tearing the cross-grain pixels.


The box was glued up in one solid cube, then opened on the table saw. We fit the macassar ebony strips by rabbeting each edge, two edges at a time, then applying the ebony with glue and blue tape, the same way you would glue in binding on a musical instrument. This took more time than the cherry, since there were 28 strips to assemble, and we could only do two at a time. I think this took us a week of evenings. But it was worth it. Doing it this way meant we didn't have to fit any butt joints. We simply ran the ebony past each end and planed it flush. Cutting the adjacent rabbet established any necessary butt joints to the previous piece. It was time-consuming, but easy.


The "lock" is a solid piece of aluminum that we lapped on a surface plate to 150 grit so it was dead flat on each face. We finished it in clear satin lacquer, which gave it almost a clear anodized look. It functions simply as a lift handle.


The lid stay is made from gabon ebony and black paracord. It's attached with socket head cap screws, tapped into the side of the chest.


To install the paracord we counterbored the back the ebony bracket and then drilled a through hole of a small diameter, just a tad larger than the paracord. We slipped one end of the paracord through, lit it on fire, then let it burn until it melted into a ball about 3/8" diameter. We extinguished the flame, then pressed the soft ball of molten cord (its nylon) into the counterbore. Once cool, its very hard and can't pull through the smaller hole.


We finished the piece with three coats of Tru-Oil, then a week cure, then a rub out with 0000 wool and Watco dark satin finish wax. It's silky smooth.


Tuesday, October 29, 2013

To Make As Perfectly As Possible


Last week was one to remember. I traveled to a secret location to do two things. Make good on an invitation from Don Williams to lend an extra set of eyes in examining H.O. Studley's piano-maker's vises (more on that soon) and take delivery of my deluxe copy of "To Make As Perfectly As Possible."

Here's a dilemma I thought I'd never face. I walk into the room with the Studley chest and bench. Don points and says, "there it is (the chest), and there's your book." I get a blank look on my face, and wander over to the chest. I stare for probably 5 minutes (maybe more). Don eventually says, "aren't you going to look at the book?" I say, "um, yeah, I probably should" or something idiotic like that.

Eventually I pull myself away from the chest and open my deluxe TMAPAP. It's imposing, like the chest. I want to peruse the tome, but it's hard to focus with Studley and Roubo doing battle for my attention. I make a decision and close the book. I'm a few steps away from the Studley ensemble, and I only have the morning to examine it. The book goes in the car and awaits its turn back home.


Finally I get a chance to examine the book up close. I'm in my office, sitting at a trestle table I built, sitting in a chair built by the editor of TMAPAP. It feels right this time. I slip the book out of its cover and open to the first page. It says in small print "To Make As Perfectly As Possible". I touch the next page and immediately try to separate it from the next page. It doesn't separate. The paper is thick. So thick that it feels like two sheets. It's intentional. A page of this size needs extra thickness for durability. If it were thinner, I could tear it.


The first thing that I notice is the color of the paper and text. It's friendly to the eyes. The font is large and easy to read. It's inviting. Then I turn another few pages and I encounter a beautiful little dropcap letter F. It's made up of stylized vegetal designs and is just the right amount of stylized that my eye has to pause ever so slightly to make out the letter.


I turn another page and a beautiful decorative element at the top of the page presents itself. It's crisply designed and printed. I take a picture of it and check the shot on the screen of my camera. I zoom in to see if I'm in focus. And I see something that my naked eye didn't catch.


In the very center of the design is a subtle change. There is a tiny head in the middle, unlike the elements elsewhere in the design. The head is only 1/8" high.


On the same page is a glorious drop cap with acanthus leaf elements. It's the first word of text in TMAPAP. I begin reading, but I only last about half a page. I've already found a problem with the book. I can't focus my attention both on the content of Roubo's masterpiece, and also on the masterpiece that is the design of the book itself. They must be taken in separately. I turn more pages to taste more of Wesley Tanner's work.


A plate appears and I take my glasses off for a closer look. The detail is excellent. I can see everything the engraver intended.


As I read on, I discovered on interesting section on Roubo's "Moxon" vise (that felt weird to write.) I was familiar with this plate, but never with accompanying text, which was quite fascinating to read.

"After benches, vises are the greatest tools of the cabinetmaker. They are of two sorts, namely,
those of Figs. 1 and 3, in which the movement is made horizontally, and of which the screws have
holes to receive iron rods, serving to move them. These vises are composed of two twin vertical
supports, AB and CD, which are of 5 to 6 thumbs in size, by 3 to 4 thumbs of thickness, because of
their lengths [in order to resist bending], which varies between 2 to 4 feet, that is to say, in that of
AB, the screws are tapped in [the rear jaw], instead of their entering completely [being tapped] in
the other [front jaw]. The length of screws of these vises should be around two-thirds the length
of the former [vises mentioned in the previous section], and 2 to 3 thumbs diameter. One should
take care that their heads are bound with an iron ring in order to prevent their splitting while one
forces them in making them move. See Figs. 1 and 3. One makes use of these vises on the bench, in
order to saw while upright, to work on the piece, or to glue the work. In one or the other of these
different cases, one secures the bench vise with two clamps so that they will be held in a fixed and
unvaried manner."


That's Roubo's "Moxon vise " alright, "...in order to saw while upright."

As I delve deeper into the book I realize this is like no other woodworking book I've ever encountered. There is an assumption in Roubo's tone that you are serious about the material he's presenting, yet he does it without presumption or arrogance. He's like your favorite teacher, one you love, but one you're also a little afraid of. After reading a good portion of the book (and I need to go back and re-read it again) I can no longer look at modern woodworking the same way. The vast majority of us are just barely scratching the surface of what Roubo and his contemporaries were capable of. We're all dabblers by comparison. I don't mean this in a degrading or insulting way. Rather, I mean it as a refreshing realization that there are high standards out there to aspire to in our woodworking. And the classy way in which Roubo presents his material is inspirational on many levels. This book has refreshed my interest in the craft like few things have.

If you didn't get on the list for a deluxe edition, Lost Art Press will be selling off the few remaining copies from the first run. Even if you don't read the text, the book itself alone is worth the price.

I hope to begin exploring some of Roubo's parquetry techniques in the future. I've been waiting years to try his method, and now that I have the text, its full speed ahead. I will be blogging about that experience as I go.

Monday, October 28, 2013

Tuck's Benchtop Moxon

Tuck of Spaghetti, California sent in these pictures and description of his Moxon benchtop joinery vise. Tuck's Moxon came out quite nice. His bench ain't too shabby either.

Here's Tuck's description.
-----
This is a Joinery bench. It is designed as such utilizing the hardware from Benchcrafted for the double-screw vise based on Joseph Moxon. Why a bench on a bench? The behemoth upon which it sits is perfectly-situated for planing and a host of other activities. However, to cut and chop out material at a comfortable height it’s simply too low. It quickly gets uncomfortable hunching over to measure, mark, and make a saw cut. Worse, it doesn’t allow me to comfortably grasp the saw with the delicacy of holding the hand of a toddler; a much-needed technique for myself for smooth sawing. Ditto for chiseling.
I’ve seen some great solutions to this problem. One of the simplest (and best, having tried it) is Jim Tolpin’s clamping support shown here and here. However, there are a lot of other operations that are made easier with a raised platform. Sketching, carving, anything that needs closer examination. Too many to mention.
This version was designed with some consideration. The pinch-points for the support of the bench were specifically sized so that they would be squeezed into place between two dogs. Further, a small pad was added to sit just in front of the dogs, pushing the plane of the fixed jaw surface flush with the front of the bench surface upon which it sits – thereby supporting the work at the front of the stationary bench. Adding work between the jaws is aided here because that work is also pushed into the front of the larger bench’s 4-inch top. When putting the bench in place, a slight tap with the palm lines it up perfectly flush. No holdfasts needed.
Both jaws were lined with suede for gripping and to protect against marring the work – though one alone would’ve been fine there. The movable chop was made thicker – to deal with any possibility of racking – and laminated so that the strength of the grain direction would aid in this endeavor. Its component stock is turned perpendicular. Finally, the benchtop and fixed chop were also laminated for added strength and rigidity. The entire thing was made from leftover parts from the planing bench.
-----